
Sunday, 30 October 2011
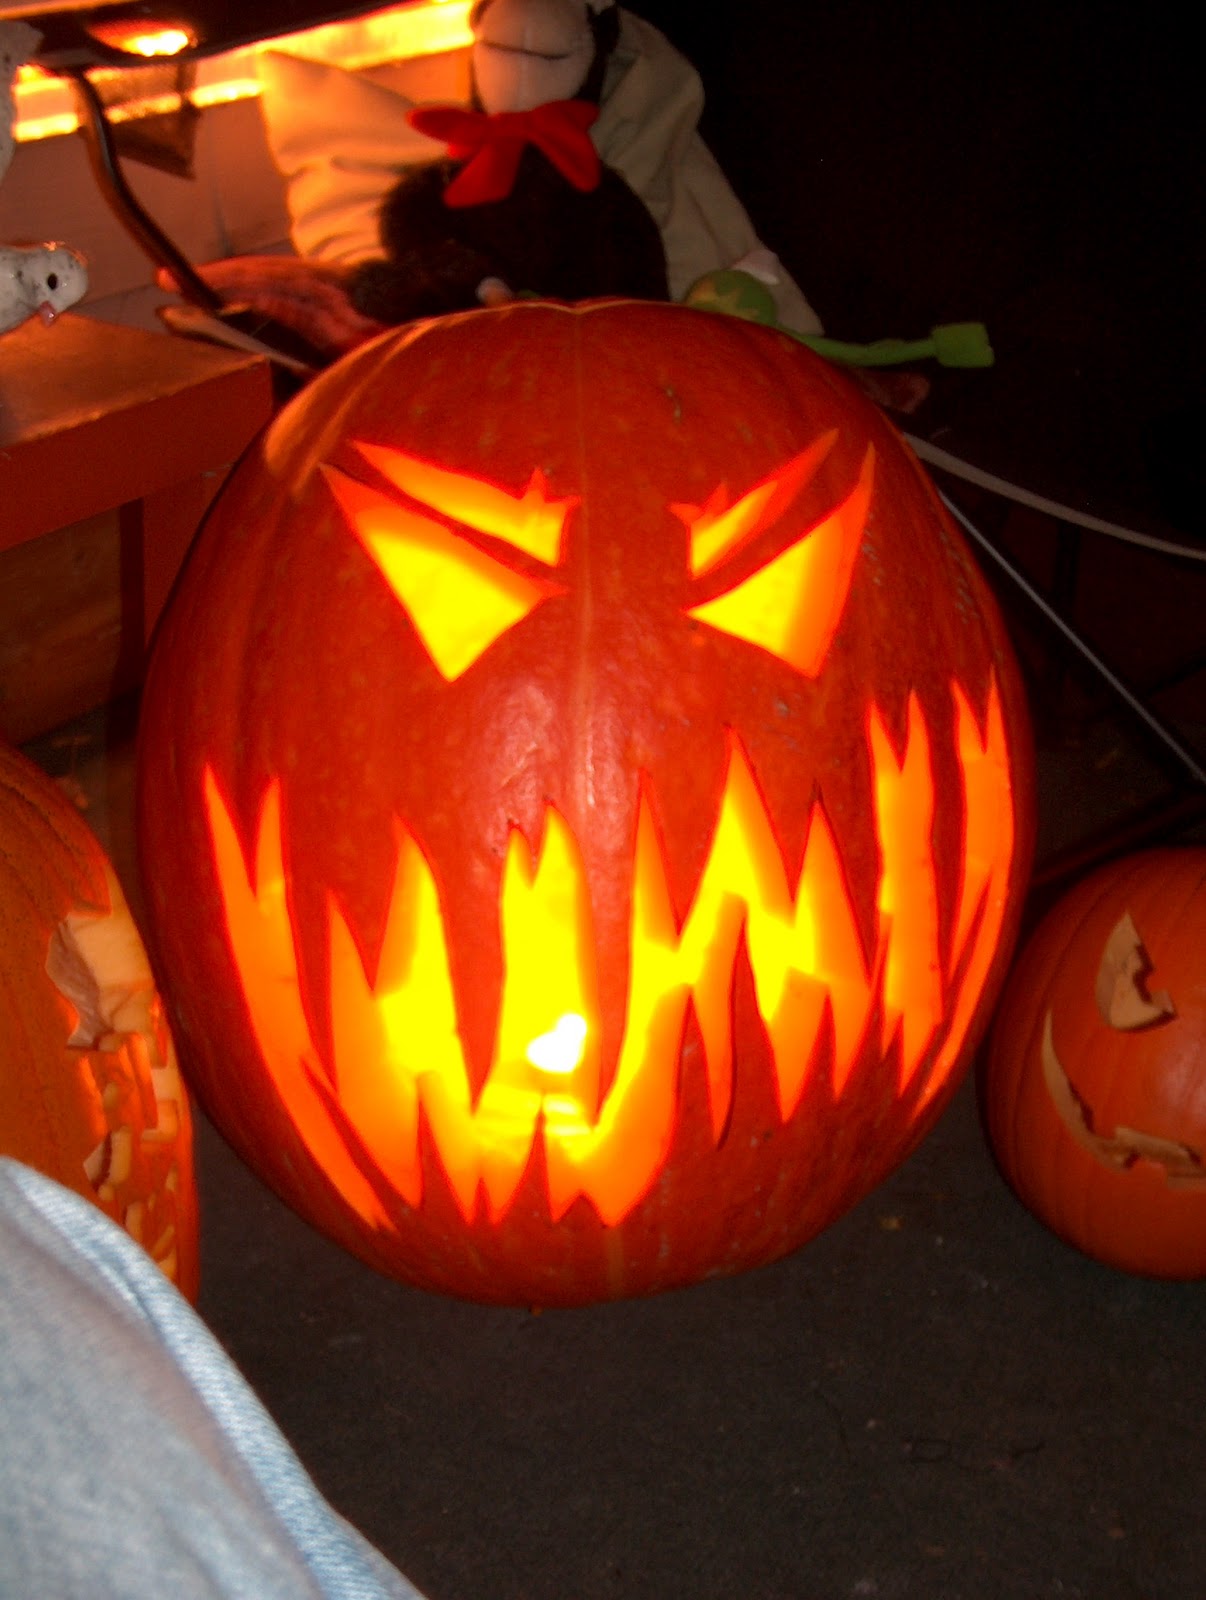
Optimus Prime
I did not have fun with this pumpkin... The long straight lines were a major pain in the behind. But owell its done now.

October 30th... comming close to the big day.
So with only 24 hours give or take to carve pumpkins left I ran out and grabbed 3 more to carve up for youre enjoyment. I plan on completing a Transformers optimus prime pumpkin, a Cthulhu pumpkin (octopus) and another pumpkin for Gongshow Hockey.
Wish me luck. I'll post pictures when I get them all completed.
Wish me luck. I'll post pictures when I get them all completed.
Saturday, 29 October 2011
Heres a step by step guide for the Gongshow Wings Logo Pumpkin
Step 1 - Applying the stencil (Hockey sock tape seems to work for me, but scotch tape will work just fine)

Step 2 - Poking the holes (I use a standard thumb tack, the holes are smaller and it doesnt damage the pumpkin as much as a standard pumpkin poker)

Step 3 - Connect the dots

Step 4 - Using the dremel for the shaded areas (Dremel)

Step 5 - Finishing the shield (Dremel)

Step 6 - The Wings (I used a standard pumpkin carving saw)

Step 7 - Finishing Touches (I used an exacto knife - little craft razor)

new techniques
so pumpkin lovers ive started encorporatings the use of a dremel drill into some of my pumpkin carvings, and heres the result... for a first couple attempts i am quite pleased with the results. hope you like them :)
Gongshow Wings Logo - 2 hours (start to finish)

Johnny Canuck Logo - 3.5 hours (start to finish)

Gongshow Wings Logo - 2 hours (start to finish)

Johnny Canuck Logo - 3.5 hours (start to finish)

Friday, 28 October 2011


100 lb pumpkin
Other More Advance Options For Pumpkin Carving
There are ofcourse different methods that I have not included in the basics of pumpkin carving and level 2 pumpkin carving.
some of them consist of using power tools (such as a dremel drill), clay moulding equipment and other little bits and bobs for the harder techniques.
I will use a bit of everything in my examples, if you require futher information on technique I am more than willing to offer assistance.
some of them consist of using power tools (such as a dremel drill), clay moulding equipment and other little bits and bobs for the harder techniques.
I will use a bit of everything in my examples, if you require futher information on technique I am more than willing to offer assistance.
Pumpkin Carving Level 2 - Using A Stencil

You can carve some truly beautiful and artistic pumpkins freehand, but if you want to create really detailed carvings you'll want to use a stencil. And all you'll need is a couple of extra tools to cut out the patterns. Below is step by step photo-tutorial on how to carve your pumpkins from a stencil. The pattern we choose is an example of a very simple design, but you can do just about anything. Use your imagination and they'll come to life!
A Carving Saw is essential for carving fine, detailed areas, but can be used for the entire Jack-O-Lantern.
A Transfer Tool is used to transfer your designs onto the face of the pumpkin. (I personally like to use a basic pushpin)
Carving Stencils can be drawn either freehand onto paper or use your computer to make your pattern.
A Transfer Tool is used to transfer your designs onto the face of the pumpkin. (I personally like to use a basic pushpin)
Carving Stencils can be drawn either freehand onto paper or use your computer to make your pattern.

Prepare the pumpkin as you would for basic carving, i.e. cut out the top hole and gut the pumpkin out. Select the paper stencil you want to use and trim the excess paper from it with scissors. Be sure to leave at least a 1/2 inch border for the tape to go on. Attach the stencil to the face of the pumpkin with tape. Top first, then the bottom and lastly the sides. You may have to crease the stencil to tape the corners, if so, try to make the creases where the pattern will be distorted the least.

Using the Transfer Tool, press the pointed tip into and through the design lines on the paper stencil spaced about a 1/8 of an inch apart. Complex and thin designs might require the dots to be a little closer together. The tip of the Transfer Tool should be pushed in just enough to go through the paper and the outer skin of the pumpkin, not all the way through the pumpkin.

It's important that you take your time when transferring the pattern from the stencil. Remember, you're making guide lines for sawing. Before removing the stencil, look it over carefully to make sure that all the lines have been transferred clearly. Once the paper stencil is removed you'll see the outline of the stencils pattern marked on the face of the pumpkin via little dots. Once you remove the stencil be sure to save it in case you need to refer to it while carving.

Using the Carving Saw, push the tip of the saw-blade into a pattern hole and saw through the design lines with short back-and-forth motions. Basically, you're playing "connect the dots". It's important to remember that these are "saws", not knives. The saw is not used in the same way as a knife. You never cut with it, you saw with it.

Take your time and follow the pattern edges carefully. Always align the saw blade to make the cuts straight into the pumpkin. When making sharp corners, remove the saw and re-insert it at the new angle. To make removal of the pieces easier you can cut them into smaller section while still in the pumpkin. Then carefully push out all of the cut pieces with your finger or an un-sharpened pencil.

Once you've removed all of the cut pieces, carefully trim the inside edges of the pumpkin of any excess flesh with the Carving Saw or a small knife. We like to carve the excess off at about a 45 degree angle. This allows more light to come through, showing your design to it's fullest. Remove any cut pieces that have fallen inside the pumpkin from your carving. Coat the edges with petroleum jelly. (See our pumpkin preserving page)

Your finished pumpkin should look like the one on the right. The silhouette, in this case a cat, should be clearly visible. When picking a design to use, make sure that it will be clear when finished. We tried a tombstone with hands clawing up, it looked cool but you couldn't tell what the hands were until you looked at it for a while. Adding a lit candle to it made it a bit easier to figure out.

The Basics Of Carving A Pumpkin

A well carved pumpkin will impress your friends, neighbours and best of all, you're trick-or-treaters!
Carving a pumpkin into a Jack-O'-Lantern freehand is the traditional way of doing it, is very easy and only takes a few basic tools. A large spoon or ice-cream scoop, a thin bladed knife and some newspaper will get you started.
With a long, thin bladed knife, cut out the top of the pumpkin around the stem of the pumpkin. The hole should be large enough to allow you to scoop out the guts (seeds and stringy membrane) by hand and with a large spoon. Generally, the size of the hole should be about two-thirds the diameter of the pumpkin. While you can cut a round circle out, you'll find that cutting a five or six sided opening will work the best. As you cut out the top hole, angle the knife so that the lid and hole will be somewhat cone shaped. This will help prevent the lid from falling into the hole. Now you can use a large spoon to scrap the inside walls of the pumpkin clean.

Inspect the surface of the pumpkin to decide the best side to carve you face. Now, visualizing the face you want to carve, use your knife to carefully cut out the individual parts of the face or you can pre-marked the pumpkin by using a Crayon to draw the face onto the surface of the pumpkin and cut through the lines you drew. When you are finished cutting, carefully push out the pieces to view the final results.

Make sure that you have scrapped the bottom of the pumpkin flat, so that the candle will sit level in the pumpkin. We prefer the traditional use of candles to illuminate our Jack-O'-Lanterns. A Votive candle, placed in a clear glass candle holder is safer and will actually last longer. Also, plain white candles give off the most light and will illuminate the inside of your Jack-O'-Lantern the best.

Well... Its about time
So... As many of you most likely know, I carve ALOT of pumpkins. This blog will help show off some of my creations, will allow you to ask for help and carving directions, I will teach you about techniques, how to pick a pumpkin... Basically everything to do with pumpkin carving.
Hope you all enjoy :)
Hope you all enjoy :)
Subscribe to:
Comments (Atom)